At Scrible, we aim to enhance your research and writing process through intuitive and helpful tools. Our How-to Guides, In-App Tours, and Toolbar Demos are designed to assist you in navigating and utilizing Scrible’s features effectively. This article provides an overview of these resources, ensuring you can make the most out of Scrible’s offerings.
How-to Guides
Scrible’s How-to Guides are a comprehensive resource. They offer several advantages:
- Updated Interfaces: Reflecting current Scrible interfaces and product changes.
- Expanded Topics: Covering a wider range of topics to meet diverse needs. As Scrible continues to add features and functionality, the library of How-to Guides will increase to reflect those changes.
- Concise and Focused: These guides are succinct, tackling one topic at a time for easy understanding.
- Responsive Webpages: As responsive webpages, these guides automatically adjust to your screen whether you are on a PC, tablet, or phone. Which means you can get help on the go.
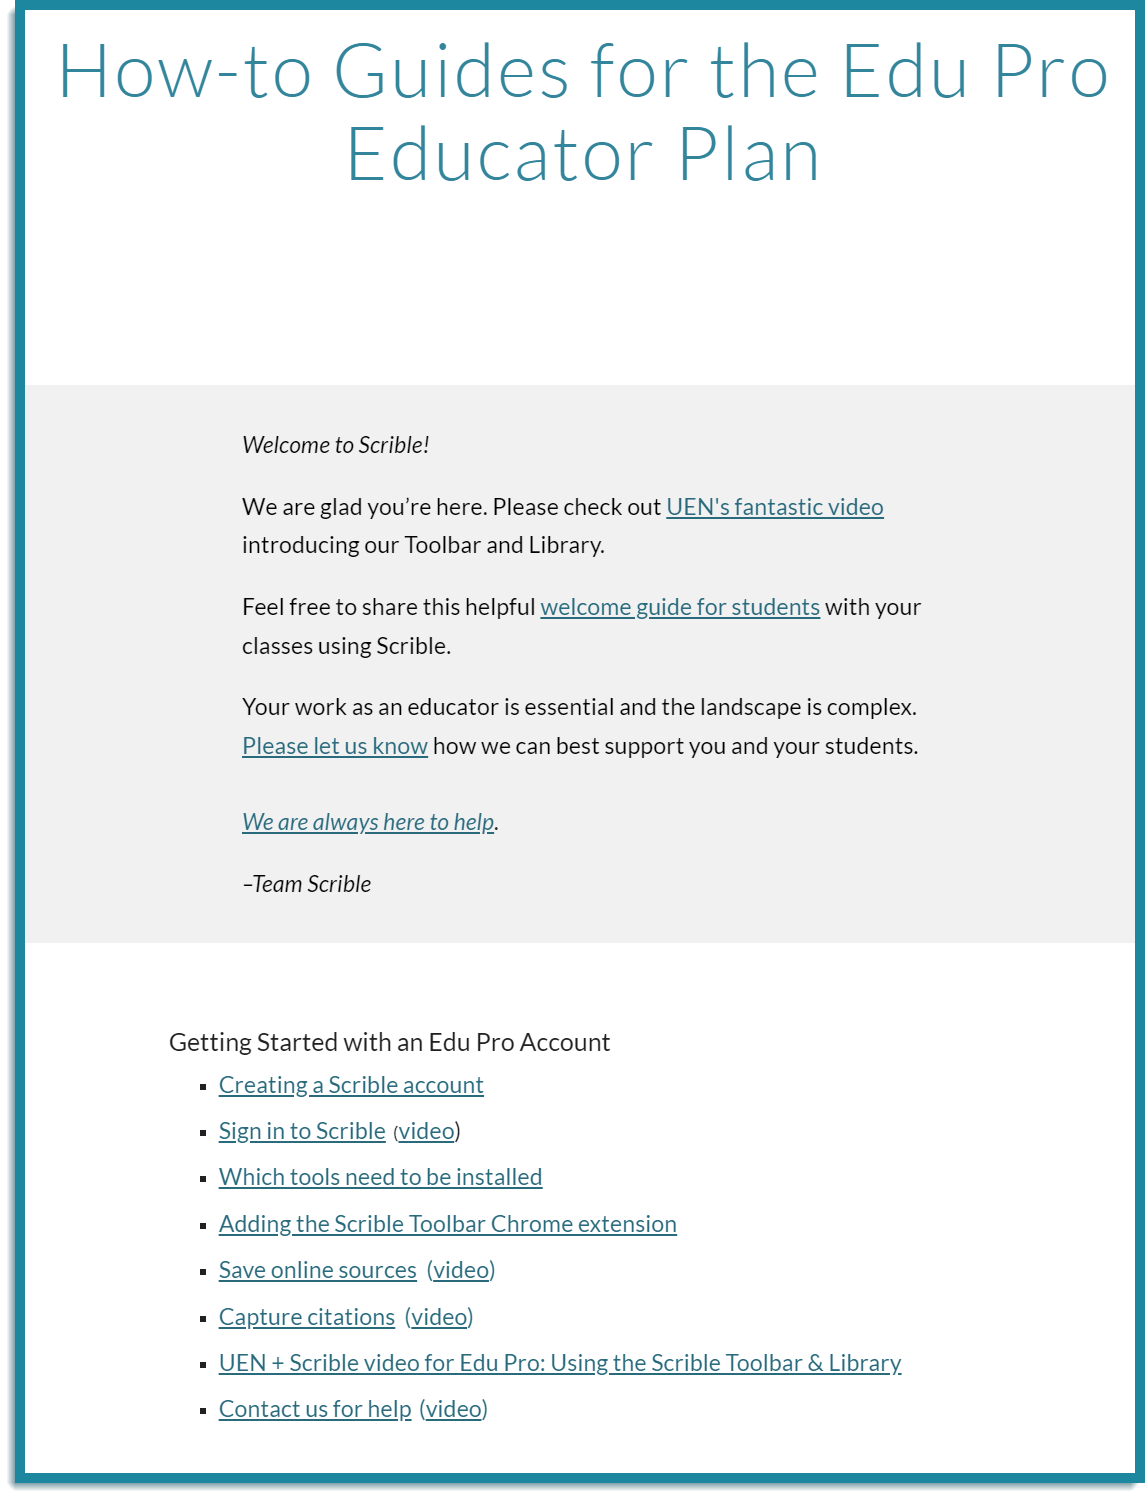
- Personalization: Guides are grouped and displayed based on your user profile and plan, ensuring relevancy and usefulness. For example, if you’re a student on our free Edu Plan, you’ll be shown the student guides for our Edu Plan. If you’re a teacher, you’ll see How-to Guides (Edu Pro Plan Teachers) under your Help menu. Selecting that will navigate you to a page listing Guides for Edu Pro Teachers. From there, you’ll see the list of guides relevant to you and can click on any of them to view the particular guide of interest.
In-App Tours
Our in-app Tours provide step-by-step, contextual guidance on using Scrible’s features. As with our How-to Guides, this is ongoing effort. Our library of in-app Tours will grow over time and cover more interfaces and features. To find the Tours, go to the Explore tab at the top of your Scrible screen.
Be sure to check out our New User Tour for an interactive and comprehensive introduction to all Scrible offers. It’s a great way to get started and make the most of our tools and features!
New Toolbar Demos:
To further aid your understanding, we have introduced Toolbar demos. These demos provide a hands-on experience, allowing you to explore the functionalities of the Scrible Toolbar in a practical, user-friendly environment. They are designed to complement our existing How-to Guides and in-app Tours, providing an immersive learning experience. To access the list of demos, go to Explore>Chapter 1: Getting Started Tour>The Toolbar (Demos), then select the demo you would like to view.
Whether you’re a student, educator, or researcher, Scrible’s How-to Guides and in-app Tours, along with our new Toolbar demos, offer valuable resources to streamline your experience. Dive into these tools to enhance your efficiency and mastery of Scrible’s robust features.
-The Scrible Team
Updated 12/08/2023 krk