Scrible

Modern research platform for school and work

  • FEATURES
  • EDU
    • For Students
    • For Educators
    • For Administrators
  • GOOGLE
  • ABOUT
  • TESTIMONIALS
    • Students
    • Educators
    • Administrators
  • PLANS
  • BLOG
  • TOOLS
  • SIGN IN

September 6, 2023 By Karen Kenjosian

Scrible Heads Back to School with New Features!


Welcome Back, Educators!

The start of a new school year is always brimming with excitement, fresh aspirations, and of course, a dash of chaos. At Scrible, we’re passionate about providing tools that help streamline and enhance your teaching endeavors.

💡 Exclusive Webinars Just for You

To kick off this school year, we’re thrilled to invite you to two exclusive webinars crafted for educators like you. Whether you’re new to Scrible or a seasoned Scribler, these sessions promise to provide invaluable insights and tips to elevate your experience.

Scrible 101: Fundamentals of Scribling!

Date: September 12th

Time: 4:00 p.m. EST

Register Here

Scrible 102: New Features for the Scrible Savvy

Date: September 14th

Time: 4:00 p.m. EST

Register Here

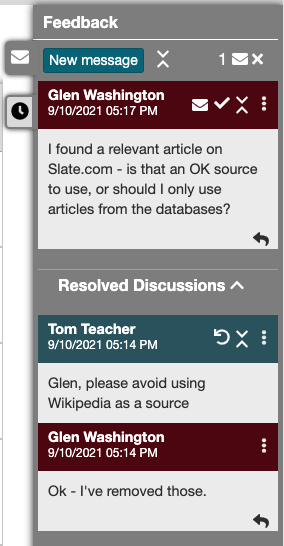
🚀 Your Feedback in Action!

We’re blown away by the consistent feedback we receive from our dedicated community of educators. Your insights have been the driving force behind our recent innovations. Here’s a sneak peek into what we’ve rolled out:

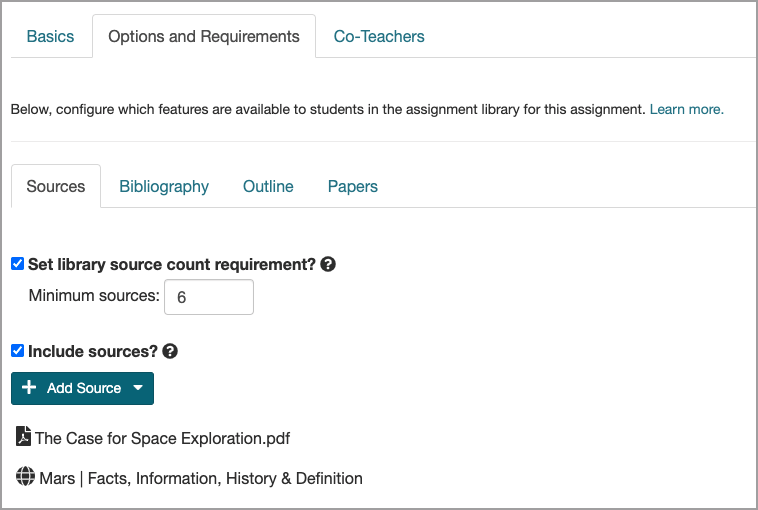
Progress Tracker Feature

See up-to-date information based on student work. View the workflow and document the different elements of the process.
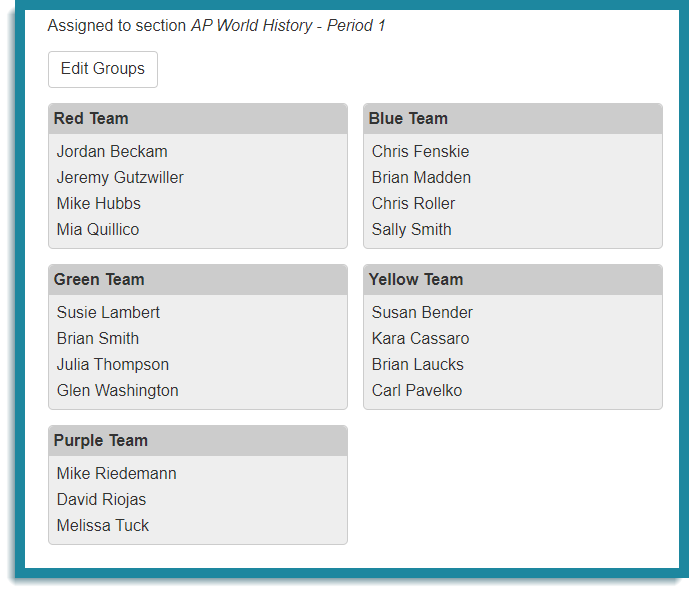
Group Assignments

Empower collaborative learning with ease by automatically sorting students into groups. Manually reassign students between groups and have the flexibility to track progress either individually or via groups.

Even more, coming soon!


🌐 Connect with Us On the Road

We’re excited to announce that we’ll be making our presence felt at several conferences this semester. We’d love to connect with you:

  • National Superintendents Forum: Sep. 17-19, San Antonio, TX
  • Georgia Regional Retreat: Oct. 1-2, Toccoa, GA
  • HERDI Panel Sessions: Oct. 7-9, Las Vegas, NV
  • HERDI Innovate Panel Sessions: Oct. 24-26, Phoenix, AZ
  • Institute for Education Innovation Fall Summit: Nov. 12-14, Boulder, CO

Thank you for your unwavering commitment to education. We’re always here to help and support you to make this school year memorable!

Filed Under: Enhancements, New Features

December 8, 2022 By Scrible

Announcing Scrible® for iPad!

We’re excited to unveil Scrible® for iPad! Our friends using iPads have been requesting Scrible® for their devices, and we’re happy to announce its launch! Scrible® is the most advanced research and writing platform ever built, and it’s now available for iPad users.

What It Is and Isn’t

Scrible® for iPad is an iPad-friendly version of Scrible®. It is not a classic, full-fledged iOS app, which would house all of Scrible® in a locally installed app on your iPad. Like the existing version of Scrible for desktops/laptops, it consists of a browser extension and a website. 

Extension and Website

The browser extension is for the iOS/mobile version of Safari. You can install this Scrible® Extension for iOS from the App Store and use it as you would our existing Chrome or Edge browser extensions on a laptop/desktop to curate and annotate online webpages and PDFs. When you use the Extension, the Scrible® Toolbar and Sidebars that appear over the articles are optimized for touch interactions and for the iPad screen size in both portrait and landscape orientations.

The website is the same one you sign into on a laptop/desktop at www.scrible.com in order to access your Scrible® account and all of its features, including My Library. This online web application (“web app”) has also been optimized for touch interactions and for the iPad screen size in both portrait and landscape orientations.

Scrible® Extension App

When you install the Scrible® Extension, this App icon appears on your iPad’s home screen:

On the iPad, browser extensions are installed as apps, but they aren’t classic, full-fledged iPad apps. In this case, the Scrible® Extension App is more of a placeholder than an app you actually work in. With Scrible® for iPad, your work happens not in the app, but in Safari, where you curate/annotate articles and work in your online Scrible® account. That said, if you do tap on the Scrible® Extension App icon on your home screen, it’ll display the following app screen:

Scrible® Extension App Screen

The four (4) white panels link to your Library in your online Scrible® account as well as external online resources to help you get started with Scrible® for iPad and use Scrible® in general.

Enabling the Extension

After installing the Scrible® Extension App, enable the Scrible® Extension for the Scrible® Extension Button (white “S” in a teal box) to appear in Safari. Follow these steps to do that:

Scrible® for iPad: Enabling the Scrible® Extension for Safari

Once that’s done, here’s how the Scrible® Extension Button looks at the right end of the URL bar in Safari:

Scrible® Extension Button at the right end of the URL bar in Safari

Using the Extension

The Scrible® Extension in Safari on the iPad works precisely like the Scrible® Extension in Chrome on your laptop/desktop. Just click the Extension when you’re reading/researching online in Safari to curate and annotate online articles. Those articles are saved to My Library (or another Library) in your online Scrible® Account, which you can sign into in Safari.

Using the Website

As with the laptop/desktop version of Scrible®, you access My Library and other parts of your Scrible® account at www.scrible.com in Safari on your iPad. You can navigate there easily by tapping the My Library panel in the Scrible® Extension App screen (shown above) or the Library Button in the Scrible® Toolbar when it’s loaded on an article in Safari.

Example of a library in Scrible® viewed on an iPad in portrait orientation.

Optimized for Touch

All of Scrible’s interfaces are now adapted and optimized for touch interactions on the iPad. This includes the Scrible® Toolbar and Sidebar that appear on articles when using the Scrible® Extension in Safari. For example, to highlight text, select the text with your finger, stylus, or Apple Pencil, then tap on the highlighter icon in the Toolbar.

Select text with touch and tap the Highlight Button to apply a highlight.

Portrait and Landscape Orientations

When viewing an article in Safari, the Toolbar and Sidebar layouts change when rotating your iPad between portrait and landscape orientations. The layout of My Library and other parts of your Scrible® account also changes based on device orientation to maximize vertical and horizontal space when the device is in portrait and landscape orientations, respectively.

Moving the Toolbar and Sidebar

The Toolbar can now be toggled from top to bottom and the Sidebar from left to right, regardless of the iPad’s orientation. Use the buttons shown in the screenshot below to toggle the location of the Toolbar or Sidebar easily.

arrows pointing to the toggle button in toolbar and sidebar
Tap the buttons shown in the Toolbar and Sidebar to reposition them.

Scrible® Extension for Safari on Mac

By the way, if you click the install link above while reading this on a Mac, you’ll notice that instead of being directed to the iOS App Store, you’re directed to the Mac App Store, where you can install the Scrible® Extension for the laptop/desktop version of Safari. That’s right; we’re launching that too! So, you can now also use Scrible® in Safari on your Mac to curate and annotate articles!

Your Feedback Makes a Difference

This is the first version of Scrible® for iPad, and your feedback will influence the updates we prioritize. Please let us know what you like and what you want to see changed or added! 

Thank you for using Scrible®!

Filed Under: Enhancements, New Features, Product Tagged With: App, Apple Pencil, browser extension, iPad, Safari, Scrible Extension, Scrible for iPad

December 7, 2021 By Scrible

Scrible Gets a New Look and Layout


We’ve given the Scrible Library a makeover and made other improvements throughout the system!

Updated Design

In addition to an overall move to a brighter, white interface, we’ve made dozens of smaller changes to buttons, fields, messages, windows, tooltips, icons and layout for design consistency to give the Scrible Library a more modern look and feel. We’ve also made numerous improvements to give the Scrible Toolbar and accompanying On-Page Sidebars more breathing room (e.g. more padding/spacing in dropdown menus) and make them easier on the eye (e.g. larger color swatches and text size in dropdown menus).

Consolidated Library Sidebars

We now have a single sidebar area on the left of the Library to display each of the available sidebars (Libraries, Tags and Annotation Key) one at a time since there’s no great need to have two of them open simultaneously. This simplifies the interface and eliminates the previously possible busy layout in which you could have the Libraries Sidebar open on the left and the Tags Sidebar or Annotation Key Sidebar open to its right. Now, each of those is only viewable one at a time. All sidebars can be collapsed when not needed to give you more screen space to view the contents of your Library.

Library with Sidebars Closed
Library with a Sidebar Open

New Add from Sources Sidebar and Button

Under the Bibliography Tab and Outline Tab, there used to be a Sources Sidebar on the right that would display your sources and allow you to add citations to your bibliography and annotations (e.g. highlighted evidence) to your outline, respectively. That sidebar now appears on the left as the new Add from Sources Sidebar. It still works the same way. It’s just folded into the new consolidated sidebars area on the left. When you’re in the Bibliography Tab or Outline Tab, you can open/close this Sidebar using its own tab. When its closed, you can also open it by clicking the new Add from Sources Button.

Outline Editor with Add from Sources Sidebar open

Source Description Back in the Library

We’ve brought the Source Description back to the Library so you can see a brief helpful blurb about each source there. These descriptions have always been available, but were not displayed alongside each source in the Library.

Remember that you can enter/edit the description for a source in 2 places – in your Library and in the Information Sidebar on a source (e.g. webpage or PDF). In your Library, click the Information Icon at far right of the source entry to display the Information Window, where you can enter/edit the description. When viewing a source, click the Information Sidebar Tab on the right to view the Information Sidebar, where you can also change the description field.

You can enter your own description for webpages and PDFs. We automatically provide one for books. When there’s no description, we show a preview of the first annotation (if there is one) in place of the description.

A description for each source is now visible in the Library.

Flipped Citation Editor Layout

The Citation Editor layout has also been updated. The autogenerated citation is now found at the bottom and the the constituent fields that make up the citation are at the top. This is intended to draw your attention to those fields so that you’re more likely to check them and see if they require your attention. We hope that helps build the good habit of double checking the fields to ensure citation accuracy.

Remember that the Citation Editor is viewable in multiple ways, including (a) by clicking the Citation Icon at the far right of a source entry in the Library, (b) by clicking the Citation Icon to the left of a citation in your bibliography in the Bibliography Tab and (c) in the On-Page Citation Sidebar when viewing a source.

Autogenerated citation at the bottom of the Citation Editor

Updated Browser Extension Button

The buttons for our Chrome and Edge browser extensions are now updated to a teal color that matches our current logo and is frequently used throughout our interfaces. If yours hasn’t changed yet, it should automatically update in the next few days. New button color; same great features!

New Scrible browser extension button design

New On-Page Sidebar Tabs Panel

The tabs for sidebars that accompany the Toolbar on right side of a webpage and in our PDF Viewer are now all visually grouped together in a single panel. On a webpage, this panel can be moved up and down using a grip area at the top and bottom of the panel in case it’s blocking underlying content.

You’ve always been able to move the Toolbar on webpages using the grips on either end.

Sidebar tabs can be moved vertically on an article to uncover underlying content.

Updated PDF Page Zoom and Navigation Controls

In our PDF viewer, we’ve consolidated the page zoom options in the Toolbar into a single dropdown menu and moved the page navigation controls to the Pages Sidebar (f.k.a. Thumbnails Sidebar). This declutters the Toolbar a bit and sensibly unifies page navigation with page thumbnails.

Page zoom and navigation controls updated in the Scrible PDF Viewer

We hope you like the makeover and that it helps you work more efficiently and effectively. As always, if you have any questions or run into any problems, please let us know!

Filed Under: Enhancements, New Features, Product Tagged With: product, ui, ux

September 16, 2021 By Scrible

Scrible Launches Revamped Assignment Management System

Educators, we’re excited to announce our new and revamped assignment features! Based on feedback from you over the years, we’ve completely overhauled and redesigned how Scrible assignments work from the ground up.

Easier Navigation

Assignments are now more visible by being in the top navigation bar of the website when you’re signed in.

Assignments are now available directly in the top navigation bar

Overview: How Assignments Work

When you create and distribute (i.e. assign) a Scrible assignment, we create a special Assignment Library for each student that houses their work for that particular assignment. You can access the work done in these assignment libraries at any time to see how your students are progressing and provide formative feedback. You can set requirements for various aspects of an assignment to create measurable goals for your students. Class-level and student-level progress toward the goals is summarized in an assignment dashboard.

Assignment Distribution Options

We redesigned how you distribute (i.e. assign) assignments to students to give you more options/flexibility.

Distribute via Class/Section

You can distribute an assignment to your classes if you’ve imported/synced them from elsewhere (e.g. Google Classroom) or manually created them within Scrible. If you teach multiple sections of the same class, you can now easily create a copy of the assignment for each section of the class.

Distribute via URL/Code

Don’t have your classes in Scrible? Want to distribute an assignment outside of a class? We now offer the ability to create a URL and code for the assignment that you can share with students. When they follow the link and sign into their account, they’ll be added to the assignment automatically. Alternatively, they can also enter the code on the Assignments Page in their accounts to join the assignment.

Updated assignment distribution options

Google Classroom Assignment Sync

If you’ve synced your class from Google Classroom, you can now also sync your assignment so that it appears as an Assignment in the Classwork tab of Google Classroom. If you enable this Google Classroom Assignment Sync, students can access the assignment from there and must submit it from there.

Scrible assignment within Google Classroom

Customizable and Changeable Assignments

Previously, you had to choose among 3 specific assignment types (annotated bibliography, research project and research paper), each with its own features. Now, there is a single, base assignment that you can easily configure to meet your needs. You choose which specific Assignment Options and Requirements (described below) to enable/disable based on your teaching and learning goals, thus enabling more flexible assignment design.

Furthermore, you can adjust the options and requirements as the assignment progresses, even after students have started working on it. For example, if you decide to add a writing component to an existing research project, you can simply enable the paper features mid-way through the assignment and students will instantly see the Papers Tab in their assignment library. So, you can update an assignment’s configuration anytime.

This real-time adjustability means you can also expose just the right features to students at just the right time to prevent them from potentially being districted early-on by features they won’t need until later in the process. It also means you can pace and stage-gate student work so that students don’t move onto the next step too early. For example, if you want to review and approve their sources in week 1 before they start their outlines in week 2, you can disable the outline feature until week 2, thus preventing them from creating outlines using bad sources.

Bottom line? You now have more options and greater control when managing assignments!

Assignment Options and Requirements

The options to customize an assignment appear in the Sources Tab, Bibliography Tab, Outline Tab and Paper Tab, all of which appear under the Options and Requirements Tab. Let’s now look at each one of these separately.

Sources

Assignments typically involve information sources (a.k.a. “sources”). For example, a paper assignment will require a set of curated articles with annotated evidence to support arguments made in the paper. You can provide students with sources or require them to curate their own sources within the assignment library.

To include sources for students, you can select sources from your own libraries to add to the assignment. These will be copied to each student’s assignment library and will include any annotations you made on the sources. So, you could highlight noteworthy passages of articles or add comment annotations containing questions you want your students to answer.

Alternatively, you can include bookmarks for sites that you recommend your students use such as specific subscription databases available to your school.

You can also set a requirement for how many sources students need for the assignment. If you set a source count requirement, the assignment dashboard will show a graph displaying each student’s progress towards that goal, along with additional metrics regarding the types of sources they curated (e.g. database article, news article, print source, etc.).

Assignment configuration options under the Sources Tab

Bibliography

If your assignment doesn’t require a bibliography, you can disable the bibliography and citation features completely and your students won’t see the Bibliography Tab in their assignment library. If the features are enabled, you can specify the required citation style (e.g. MLA, APA, Chicago) and control additional features such as specifying whether to use an annotated bibliography and/or split bibliography (e.g. for National History Day projects).

You can set the required number of sources your students should have in the bibliography. If you choose to use an annotated bibliography, you can also specify the number of words your students must write in the citation annotation for each source. Note: we call these citation annotations to avoid confusion with annotations such as highlights, comments, etc. Additional metrics will be shown in the assignment dashboard to show progress towards these goals.

Assignment configuration options under the Bibliography Tab

Outline

If your assignment doesn’t require an outline, you can disable the outline features and the students won’t see the Outline Tab in their assignment library. We’ll be adding additional options here later.

Option to enable outline features for an assignment

Papers

If your assignment doesn’t require a paper, you can disable the paper features and students won’t see the Papers Tab in their assignment library. If you enable them, you can also create the document for them to write in for the assignment. This can be a new blank document, or you can select an existing doc from Google Drive or Microsoft OneDrive to use as a template. Each student will receive their own copy of the document to work in.

You can specify a word count requirement for the paper, which will display a metric in the assignment dashboard tracking student progress toward the word count goal.

Options for papers in assignments

New Feedback System

Assignments now have a built-in feedback system in the form of threaded discussions in a new Feedback Sidebar, which you’ll see on the Assignment Review Page and your students will see on their Assignment Page for an assignment. You and your students can post new messages to initiate topics of discussion. You can provide feedback and students can request feedback or clarifications on various aspects of an assignment. You and they can reply to one another. Once the discussion is complete, you or they can mark it as resolved to minimize and move it to the bottom of the Sidebar. All resolved discussions are preserved and can be marked unresolved to move them back up for continued discussion.

Moving feedback to this new Feedback Sidebar yielded a new layout for the Assignment Review Page that now provides you with more space to view/review student work to the left of the Sidebar.

Assignment Feedback Sidebar

Assignment Management Example

Let’s consider a research paper assignment. Let’s say you want to focus your students first on collecting sources and finding important facts. So, you create the assignment and disable the bibliography and citation, outline and paper features so your students don’t get ahead of themselves or distracted by the corresponding tabs in their assignment library.

For younger or inexperienced students, you might not want them to search for sources. So, you include sources in the assignment that you’ve previously curated as the starting point for their research. As a result, they can just focus on annotating those sources to find the facts they’ll need.

When the class is ready to move on, you can adjust the assignment to enable the bibliography and citation and outline features. The corresponding Bibliography Tab and Outline Tab will then become available in your students’ assignment library so they can start creating their outlines and bibliographies.

When the class is ready to start writing the paper, you can adjust the assignment to enable the paper feature and create a paper using an existing Google doc as a template, with each student receiving their own copy of the template.

Legacy Assignments

Already created an assignment this semester? It’s still available via the Legacy Assignments section link at the bottom of the new Assignments Page.

Have Questions?

See our new help guides that cover this new assignment management system in detail.

If you still have any questions or suggestions for improvement, including new features requests, please let us know!

Filed Under: Enhancements, New Features Tagged With: assignments

October 8, 2018 By Scrible

Scrible Revamps Google Docs Add-on

We’ve totally revamped Scrible Writer, our Google Docs Add-on that helps you bring your research into the writing process in Google Docs. It’s now faster and let’s you view and insert your outline and more easily view and edit your bibliography.

Wait. What’s Scrible Writer again?

To recap, Scrible Writer is our powerful writing companion for Google Docs. Here’s an excerpt showing the previous version of Scrible Writer from our general Scrible Edu demo video (which’ll be updated to reflect recent product changes):

Scrible Writer requires and works with your Scrible account. You can find and install it in your Google Docs account via the G Suite Marketplace or by searching for it within Google Docs under Add-ons > Get add-ons…. Once you’ve installed it, it’ll always appear as one of your add-ons under the Add-ons menu. Whenever you want to use Scrible Writer, simply select it from that menu to load it as a Sidebar that’ll appear to the right of your Doc. That Sidebar represents a slimmed down version of your Scrible Library so that you have easy access to your research while writing a paper. The first time you load Scrible Writer, you’ll need to connect it to your Scrible account.

Previously, Scrible Writer contained your Library’s sources so you could easily browse and full-text search your Library from within a Google Doc while writing your paper. You could click on an annotated passage or comment shown in the Sidebar to add it to your paper. Annotated passages could be inserted as quotes in the Doc and their corresponding in-text citations were automagically inserted too. The citations were also as added to your Bibliography, which was automagically maintained and inserted on the last page of your Doc so you can spend less time on tedious manual formatting and more time crafting your brilliant paper!

Access to the various Scrible Writer features depends on which Scrible plan you’re on. You get a lot in a free plan (Basic or Edu), but of course you get much more if you’re on a paid plan (Edu Pro).

Awesome! Now, what’s new?

First, we’ve re-engineered how Scrible Writer works with Google Docs so that inserting quotes is much faster now.

Second, we’ve updated the interface to a new tabbed layout.  Edu Pro users will see 3 tabs – Sources, Outline and Bibliography.

The Sources Tab works as Scrible Writer worked before. Browse and search your sources and annotations. Click to insert annotations as quotes into the Google Doc and the corresponding in-text citation is inserted as well and your Bibliography is automagically updated in the background.

The Bibliography Tab (available to Edu and Edu Pro users) replaces the previous Bibliography Preview Window that used to float over the Doc when you clicked the previous red Bibliography Button in the Sidebar. That Button is now gone.  You can simply click on the Bibliography Tab to view the current state of your Bibliography at any time. You can change the citation style for your paper here (e.g. from MLA to APA).  You can review what sources are in your bibliography and remove sources or edit their details right in the sidebar.  For Edu Pro users, all changes are synced in real time back to the Bibliography Tab in your Library. Nice!


The Outline Tab (available to Edu Pro users) allows you to view the outline you created in the Outline Tab of your Scrible Library.  You can click the Insert Link to insert the entire outline into the Doc, including in-text citations that accompany quotes. You can also click the Edit Link to navigate back to the Outline Tab in your Library, where you can edit the outline.


You’ll also notice a new Status Icon to the left of the Sources Tab. This Status Icon will let you know if your bibliography and in-text citations in the Doc are out of date.  If you change your bibliography via the Bibliography Tab in your Library or update the citation details for any of the sources cited in the Doc, the Status Icon will change from a green checkmark to a red exclamation mark ().  Clicking this will trigger Scrible Writer to refresh your in-text citations and the bibliography on the last page of your Doc.  This refresh also happens in the background automatically every time you insert a quote/citation into the Doc. While this is happening, the Status Icon appears as a syncing yellow spinner icon and then turns into the green check mark. Powerful stuff!


We think these updates make Scrible Writer much easier to use.  Let us know if you have any questions or run into problems!

— The Scrible Team


Filed Under: Enhancements, Product Tagged With: bibliography, google docs add-on, outline

  • 1
  • 2
  • 3
  • …
  • 5
  • Next Page »
Facebook Twitter LinkedIn YouTube

Copyright © 2025 Scrible | Home | Help | FAQ | Terms | Privacy | Contact

Supported by the National Science Foundation National Science Foundation.