Scrible

Modern research platform for school and work

  • FEATURES
  • EDU
    • For Students
    • For Educators
    • For Administrators
  • GOOGLE
  • ABOUT
  • TESTIMONIALS
    • Students
    • Educators
    • Administrators
  • PLANS
  • BLOG
  • TOOLS
  • SIGN IN

April 17, 2019 By Victor Karkar

Scrible Announces Teacher Plan

New Scrible Edu Pro Teacher Plan makes Edu Pro features affordably accessible to individual teachers and their students

Image Credit: Google Edu

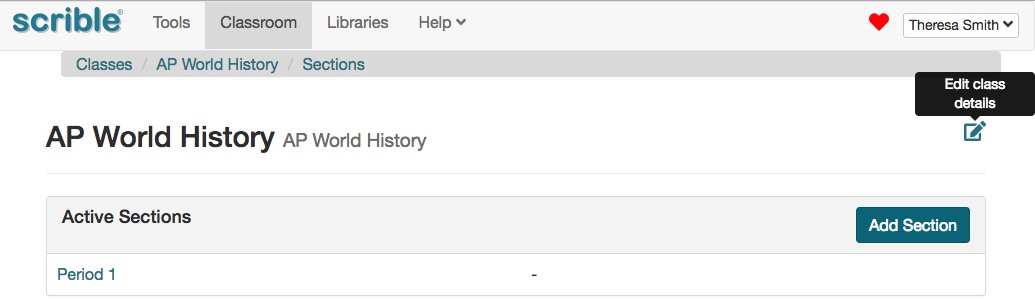
We’re excited to announce our new Edu Pro Teacher Plan! It’s an affordable annual subscription to Scrible Edu Pro that gives teachers and their students all the power and benefits of Edu Pro. See our Plans Page for feature details and how this new Teacher Plan compares to our other Plans. Here are the highlights (pun intended): 

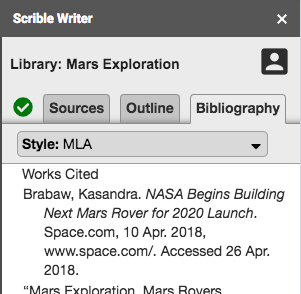
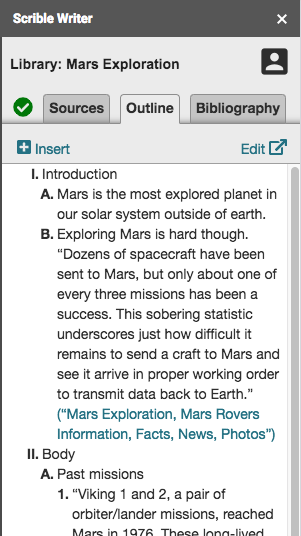
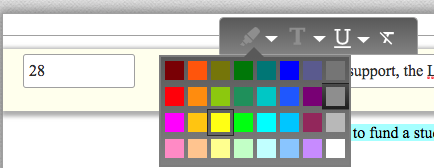
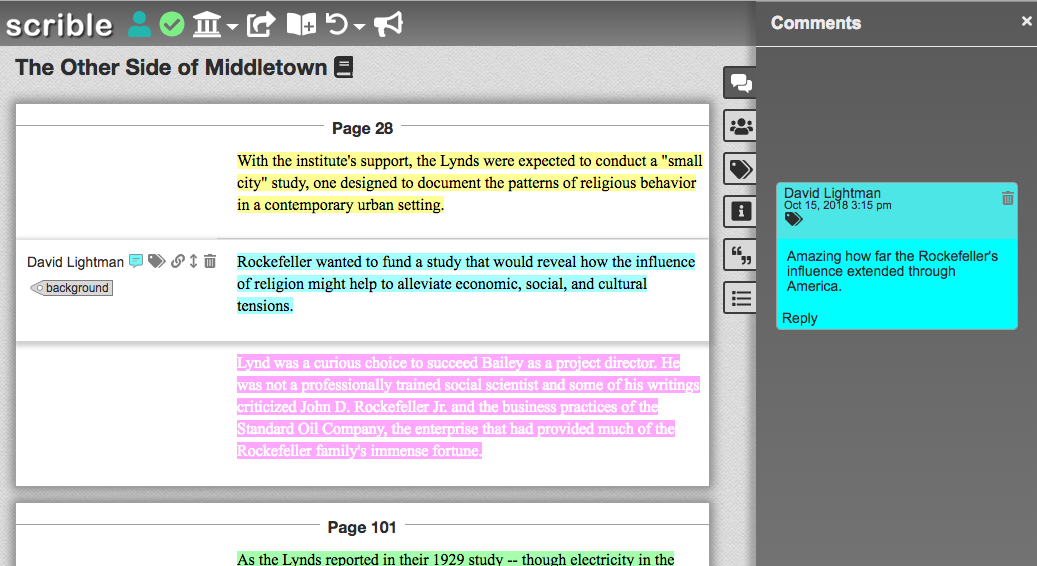
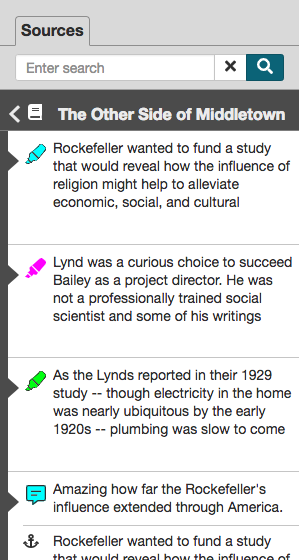
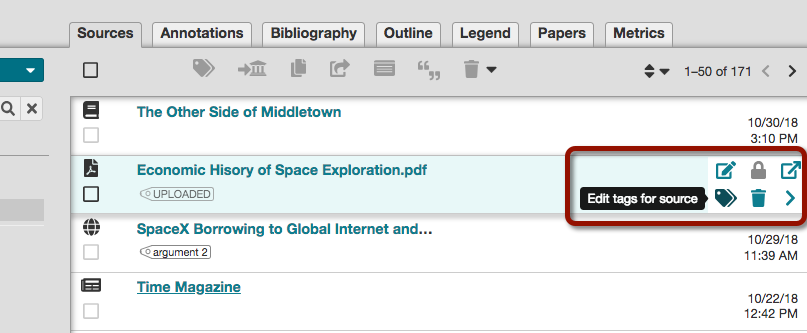
• Assignments for your classes
• Real-time student progress data
• 5 more libraries for you
• 1 more library for each student
• All libraries become sharable
• Annotations preview feature
• Annotation Summary feature
• Annotation Legend feature
• Annotation-level view of library
• 28 more annotation colors
• 5 more annotation styles
• Outline editor for each library
• Savable bibliography for each library
• Support for books and print sources
• 10 more citation source types
• 9,000+ citation styles

Teachers New to Scrible: Automatic Free Trial

When teachers new to Scrible sign up for a free Edu account, they and their students automatically get a free 14 day trial to Edu Pro features. When the trial ends, their accounts return back to our free Edu Plan, but they’ll still be able to access the libraries and sources they created during the trial.

Teachers Already on Scrible: Start Free Trial

If you’re a teacher already on our free Edu Plan, start your free trial of the Teacher Plan from within your account under Settings > Plan > Upgrade Options OR  click the red NEW: Try Edu Pro Teacher Plan free message next to the Help menu.

Continuing with Teacher Plan

During or following the free trial, a teacher and their students can continue with Edu Pro features when the teacher subscribes to an annual subscription of the Teacher Plan for only $119.99 USD via our website! This brings the most advanced research and writing platform ever built within reach for teachers and their students without having to convince their entire school or district to buy in!

School/District Purchase Option

An invoicing option is available for schools and districts purchasing 2 or more Edu Pro Teacher subscriptions for $169.99 USD per year per teacher. Limit of 8 per school or 18 per district, beyond which you should consider a Grade, Department, School, District or Campus Plan by contacting us here.

Special Offer

Upgrade from trial to paid subscription this month (April) and get the Teacher Plan through August 1, 2019. That’s 3 months free!

Filed Under: Product, Uncategorized

October 8, 2018 By Scrible

Scrible Now Supports Co-Teaching

(Image credit: Wisconsin Department of Public Instruction)

Educators whose school, district or campus subscribes to Scrible Edu Pro can now add co-teachers to their classes.  A co-teacher has the same access to all sections, student assignments and class libraries as the teacher who created the class.  For those who sync their classes to Scrible from Google Classroom, we now automatically sync co-teachers in Google Classroom into their classes in Scrible.

You can view the co-teachers for a class by going to your Classroom page in Scrible and choosing your class from the list.  This will open the Class Page, which lists the sections of that class.  Click the edit icon to the right of the class title to edit the class details.


On the subsequent Edit Class Page, you’ll see a new section for Co-Teachers displaying the current list of co-teachers for the class.


If you’re using Google Classroom, you won’t have the Add Co-Teacher Button.  You’ll need to add co-teachers in Google Classroom and let them sync over to Scrible via our Google Classroom Sync.

For classes that aren’t being sync’d from Google Classroom or other applications (like a learning management system (LMS)), click the Add Co-Teacher Button and enter your co-teacher’s email address to invite them.

After they’re invited, when they’re in their Classroom page, they’ll see a pop up notice alerting them of their pending co-teaching invites.  When they click on this alert, it’ll pop up a list of co-teaching invites that allows them to accept or decline each invite.


We’d love to hear your feedback on this new feature. Let us know what you think!

— The Scrible Team

Filed Under: New Features, Product Tagged With: classroom, co-teaching, google classroom, teacher

October 8, 2018 By Scrible

Scrible Revamps Google Docs Add-on

We’ve totally revamped Scrible Writer, our Google Docs Add-on that helps you bring your research into the writing process in Google Docs. It’s now faster and let’s you view and insert your outline and more easily view and edit your bibliography.

Wait. What’s Scrible Writer again?

To recap, Scrible Writer is our powerful writing companion for Google Docs. Here’s an excerpt showing the previous version of Scrible Writer from our general Scrible Edu demo video (which’ll be updated to reflect recent product changes):

Scrible Writer requires and works with your Scrible account. You can find and install it in your Google Docs account via the G Suite Marketplace or by searching for it within Google Docs under Add-ons > Get add-ons…. Once you’ve installed it, it’ll always appear as one of your add-ons under the Add-ons menu. Whenever you want to use Scrible Writer, simply select it from that menu to load it as a Sidebar that’ll appear to the right of your Doc. That Sidebar represents a slimmed down version of your Scrible Library so that you have easy access to your research while writing a paper. The first time you load Scrible Writer, you’ll need to connect it to your Scrible account.

Previously, Scrible Writer contained your Library’s sources so you could easily browse and full-text search your Library from within a Google Doc while writing your paper. You could click on an annotated passage or comment shown in the Sidebar to add it to your paper. Annotated passages could be inserted as quotes in the Doc and their corresponding in-text citations were automagically inserted too. The citations were also as added to your Bibliography, which was automagically maintained and inserted on the last page of your Doc so you can spend less time on tedious manual formatting and more time crafting your brilliant paper!

Access to the various Scrible Writer features depends on which Scrible plan you’re on. You get a lot in a free plan (Basic or Edu), but of course you get much more if you’re on a paid plan (Edu Pro).

Awesome! Now, what’s new?

First, we’ve re-engineered how Scrible Writer works with Google Docs so that inserting quotes is much faster now.

Second, we’ve updated the interface to a new tabbed layout.  Edu Pro users will see 3 tabs – Sources, Outline and Bibliography.

The Sources Tab works as Scrible Writer worked before. Browse and search your sources and annotations. Click to insert annotations as quotes into the Google Doc and the corresponding in-text citation is inserted as well and your Bibliography is automagically updated in the background.

The Bibliography Tab (available to Edu and Edu Pro users) replaces the previous Bibliography Preview Window that used to float over the Doc when you clicked the previous red Bibliography Button in the Sidebar. That Button is now gone.  You can simply click on the Bibliography Tab to view the current state of your Bibliography at any time. You can change the citation style for your paper here (e.g. from MLA to APA).  You can review what sources are in your bibliography and remove sources or edit their details right in the sidebar.  For Edu Pro users, all changes are synced in real time back to the Bibliography Tab in your Library. Nice!


The Outline Tab (available to Edu Pro users) allows you to view the outline you created in the Outline Tab of your Scrible Library.  You can click the Insert Link to insert the entire outline into the Doc, including in-text citations that accompany quotes. You can also click the Edit Link to navigate back to the Outline Tab in your Library, where you can edit the outline.


You’ll also notice a new Status Icon to the left of the Sources Tab. This Status Icon will let you know if your bibliography and in-text citations in the Doc are out of date.  If you change your bibliography via the Bibliography Tab in your Library or update the citation details for any of the sources cited in the Doc, the Status Icon will change from a green checkmark to a red exclamation mark ().  Clicking this will trigger Scrible Writer to refresh your in-text citations and the bibliography on the last page of your Doc.  This refresh also happens in the background automatically every time you insert a quote/citation into the Doc. While this is happening, the Status Icon appears as a syncing yellow spinner icon and then turns into the green check mark. Powerful stuff!


We think these updates make Scrible Writer much easier to use.  Let us know if you have any questions or run into problems!

— The Scrible Team


Filed Under: Enhancements, Product Tagged With: bibliography, google docs add-on, outline

October 8, 2018 By Scrible

Scrible Expands Support for Books and Print Sources

(Image credit)

Scrible Edu Pro has long offered the ability to add books and print sources to your bibliography via the Add Offline Source feature.  We’ve now taken this to the next level!  The Add Offline Source option has been replaced with two new options: Add Book and Add Print Source.


Working with Books

When you add a book, as you enter its title, we suggest potentially matching books and automatically populate the citation details. You can also enter a book’s ISBN to search by that instead.


Once you’ve selected the book and clicked the Create Button, the book is added to your Library as a new source.


When you open it, you’re brought into our new Book and Print Source Editor. It allows you to enter passages and annotations from these sources into Scrible. Simply click the Add Passage Button  to show the Passage Editor and then type in a passage and enter its corresponding page number in the book. Page numbers are optional but encouraged because passages are grouped by page to help keep them ordered correctly. The Editor displays each page with the all of passages you’ve entered for that page. By default, passages are added to a page in the order you enter them, but you can drag and drop them within a page to reorder.


While editing a passage, a mini annotation toolbar appears atop the Passage Editor with options to set the color and style of the passage. You can apply an annotation type and color to each passage so you can maintain a consistent annotation style across all of your digital sources (e.g. webpages and PDFs) and print sources (e.g. print books, magazines, newspapers, etc.).


Once entered, as with annotated text in digital sources (e.g. webpages and PDFs), you can apply tags to annotated passages and add comments to them using the icons appearing to the left of each passage when you hover over it.


As with webpages and PDFs, all annotations and tags for book and print sources flow through the system and appear in the Sources Sidebar in the Outline Editor in your Library and the Scrible Writer Google Docs Add-on.


Working with Print Sources

The screenshots shown here are for the example of working with a book, but what about print sources like a print magazine or newspaper? Similar story. When you choose Add Print Source in a Library, the print source you enter is added to that Library. Opening the source brings you into our Book and Print Source Editor. As with books, you can add a page number and passage so that your entered passages are grouped and ordered by page. You can apply annotation styles/colors, attach comments and add tags to the passage. In this case, however, the icons are a bit different. Instead of the book icon in your Library, the print source appears as a newspaper icon  and the Add Passage Button is similar . As with the book annotations and tags, everything for a print source flows through the system and appears in the Sources Sidebar in the Outline Editor in your Library and the Scrible Writer Google Docs Add-on.


We’d love to hear your feedback on these capabilities. Let us know!

— The Scrible Team

Filed Under: New Features, Product Tagged With: annotation, books, citation, magazines, newspapers, print sources

October 8, 2018 By Scrible

Scrible Improves Tagging System


(Image credit)

We’ve revamped Scrible’s tagging system to make it easier and more intuitive to create, apply and manage tags for your sources and annotations!

Add/Remove Tags to/from Sources and Annotations

When hovering over a source (under the Sources Tab) or annotation (under the Annotations Tab) in your Library, an Actions Drawer appears at the far right end of the source/annotation with various options for that source/annotation.  One of those options is the ability to edit the tags for that source/annotation.


Just click on the tags icon to display the Add/Remove Tags Window, which allows you to view the tags already applied to the source/annotation. Start typing to see matching tags that already exist in the Library. Select one of those or type a new tag and apply it the source/annotation. Hovering over an already-applied tag reveals a red x at the right end of the tag. Clicking the x removes the tag from the source/annotation.


Edit and Delete Tags

The ability to edit tag names and delete tags from a Library is now right in the Tags Sidebar at the left side of the Library.  When hovering over a tag in the Sidebar, options to edit and delete the tag appear to its right.


Bulk Adding/Removing Tags

Applying/removing tags to/from multiple sources/annotations in a Library can be accomplished by selecting the sources/annotations and clicking the Tags Button atop the Library.

This displays the Bulk Add/Remove Tags Window, which contains a list of all tags in the Library. Simply check or uncheck multiple tags to apply or remove them from the selected sources/annotations. A horizontal line through the checkbox for a tag indicates that the tag is applied to some – but not all – of the selected sources/annotations.


We’d love to hear your feedback on these capabilities. Let us know!

— The Scrible Team

Filed Under: Enhancements, Product Tagged With: Tagging

  • « Previous Page
  • 1
  • 2
  • 3
  • 4
  • 5
  • 6
  • …
  • 10
  • Next Page »
Facebook Twitter LinkedIn YouTube

Copyright © 2025 Scrible | Home | Help | FAQ | Terms | Privacy | Contact

Supported by the National Science Foundation National Science Foundation.